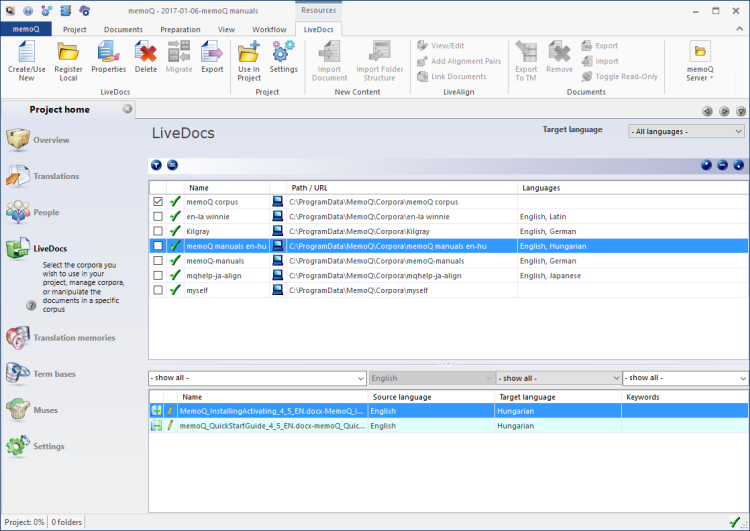
memoQ's LiveDocs technology allows you to reuse existing translations without going through a translation memory. You can also use it to add background material to the project. In the LiveDocs pane of Project home, you can manage LiveDocs corpora and the documents inside them.
LiveDocs corpora work with all languages: An empty LiveDocs corpora has no languages. You can add documents and document pairs of any language. A LiveDocs corpus offers matches in all the languages of the documents in it.
Use local and online LiveDocs corpora: In Project home, you can use LiveDocs corpora from your own computer, as well as LiveDocs corpora from memoQ servers that you have access to.
- From the Dashboard, create or open a project. Or, check out a project from a memoQ server.
- Under Project home, click LiveDocs. The LiveDocs pane appears.
- On the LiveDocs ribbon, click Create/Use New.
- The New corpus window opens. Type a name for a corpus. At the bottom of the window, you can fill in other details if your organization uses them.
- Click OK.
The LiveDocs corpus appears in the list at the top. Its check box will be checked - it will be ready to use in the project.
To view the contents of a LiveDocs corpus: Click the name of the corpus in the upper list. At the bottom of the LiveDocs pane, memoQ will show the list of documents in the selected corpus. At the bottom, you always see the contents of one corpus, the selected one.
Before you can do anything with a LiveDocs corpus, you must add it to the project.
- In the upper half of the LiveDocs pane, find the corpus in the list.
- Click its check box on the left.
The LiveDocs corpus moves to the top of the list. The corpora in use always appear grouped at the top of the list.
To view the contents of a LiveDocs corpus: Click the name of the corpus in the upper list. At the bottom of the LiveDocs pane, memoQ will show the list of documents in the selected corpus. At the bottom, you always see the contents of one corpus, the selected one.
Normally, memoQ will take LiveDocs corpora from your own computer. However, you can use online LiveDocs corpora from memoQ servers that you have access to.
To view the LiveDocs corpora from a memoQ server or from a memoQ cloud subscription:
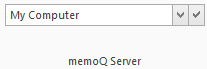
- On the LiveDocs ribbon, there is a memoQ server icon, or a memoQ server drop-down box. Click the icon, and type or choose the address of the memoQ server. Or, simply type or choose the address of the memoQ server if the drop-down box is there on the ribbon.
- After you type or choose the address of the memoQ server, click the tick mark
 icon.
icon.You may need to log in to the memoQ server: If you have not used the server before, the Log in to server window opens. Type your user name and password for that server, and click OK.
- memoQ will show the LiveDocs corpora from that server.
You must have permission for the LiveDocs corpora: It is not enough to have access to the memoQ server. To use a LiveDocs corpus, you need at least Lookup permission over the LiveDocs corpus itself. If you are not sure, contact the owner of the memoQ server.
- To use a LiveDocs corpus from a memoQ server, simply check its check box.
If the project is a checkout of an online project: If you check out an online project, it may use LiveDocs corpora from the same server where the online project is. In this case, you get permissions for the LiveDocs corpora with the project, or because you were assigned tasks in the project.
If there are too many LiveDocs corpora on the memoQ server, you can filter the list:
- At the top of the LiveDocs pane, click the Filter
 icon. The filter controls appear:
- The most efficient way to filter the list is to type a word or two in the Name/description box. It will narrow the list immediately to LiveDocs corpora that have those words in their names or descriptions.
- You can also choose from the basic details (Project, Client, Domain, Subject - if they are filled in for all or most of the corpora), and the from the languages in the corpora. For example, you may be interested in corpora that contain documents for the client called 'memoQLtd', have translations into French, and the word 'Legal' is in their names.
When you make a selection in one of the boxes, memoQ filters the list immediately.
To hide the filter controls: Click the Filter
icon again.
- Make sure that the document pair - the source-language document and its translation - is at hand.
- In the upper half of the LiveDocs pane, choose the LiveDocs corpus where you want to add the document pair.
To view the contents of a LiveDocs corpus: Click the name of the corpus in the upper list. At the bottom of the LiveDocs pane, memoQ will show the list of documents in the selected corpus. At the bottom, you always see the contents of one corpus, the selected one.
- On the LiveDocs ribbon, click Add alignment pairs. The Add multiple files for alignment window opens.
- Set the languages. On the left, add the source-language document. On the right, add its translation. Adjust alignment settings if necessary. Make sure you add keywords, so that you can filter for the document pair later on. Click OK.
To learn more: See Help about the Add multiple files for alignment window.
If the selected LiveDocs corpus is on a server: The documents will be uploaded automatically.
memoQ imports both documents, and aligns them. This is an automatic process: memoQ will try to match the segments in the source document to the segments in the translated document.
To learn more: There's an explanation at the top of the Help page about the alignment editor.
The document pair appears on the second list.
memoQ will start indexing the new document pair. Depending on the size of the documents, memoQ will start offering matches from the new document pair in a minute, or in several minutes at worst.
- Make sure that the bilingual document is at hand.
- In the upper half of the LiveDocs pane, choose the LiveDocs corpus where you want to add the bilingual document.
To view the contents of a LiveDocs corpus: Click the name of the corpus in the upper list. At the bottom of the LiveDocs pane, memoQ will show the list of documents in the selected corpus. At the bottom, you always see the contents of one corpus, the selected one.
- On the LiveDocs ribbon, click Import document. An Open window appears. Find and select the bilingual document, then click Open.
- The Document import options window opens. It's the same as in the Translations pane, but there are three extra fields:
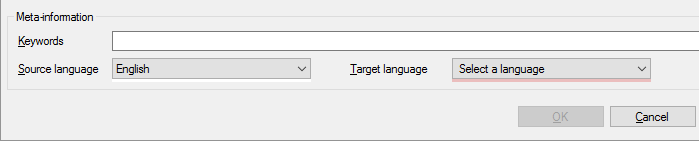
- In the Keywords box, type some words that describe the document. Separate them with commas. Later on, you can use these to find the document.
- Set the target language: Choose it from the Target language drop-down box. memoQ will find out the source language from the document.
- Click OK.
To learn more: See Help about the Document import options window.
If the selected LiveDocs corpus is on a server: The documents will be uploaded automatically.
The bilingual document appears on the second list.
memoQ will start indexing the new bilingual document. Depending on the size of the document, memoQ will start offering matches from its contents in a minute, or in several minutes at worst.
In a LiveDocs corpus, monolingual documents are useful when they contain reference text in one of the target languages of the project. Translators who translate into a foreign language can check these documents for usage examples in the target language.
- Make sure that the document is at hand.
- In the upper half of the LiveDocs pane, choose the LiveDocs corpus where you want to add the document.
To view the contents of a LiveDocs corpus: Click the name of the corpus in the upper list. At the bottom of the LiveDocs pane, memoQ will show the list of documents in the selected corpus. At the bottom, you always see the contents of one corpus, the selected one.
- On the LiveDocs ribbon, click Import document. An Open window appears. Find and select the document, then click Open.
- The Document import options window opens. It's the same as in the Translations pane, but there are two extra fields:
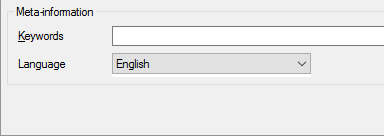
- In the Keywords box, type some words that describe the document. Separate them with commas. Later on, you can use these to find the document.
- Set the language: Choose it from the Language drop-down box.
- Click OK.
To learn more: See Help about the Document import options window.
If the selected LiveDocs corpus is on a server: The documents will be uploaded automatically.
The document appears on the second list.
memoQ will not return matches from a monolingual document. Instead, translators and reviewers can run Concordance in the target language to check examples.
To learn more: See Help about the Concordance window.
You may import two monolingual documents in a LiveDocs corpus first, and then make them a document pair.
To do this:
- Import the two documents separately in the LiveDocs corpus.
- In the second list, select the two documents. Make sure that no other documents are selected.
- On the LiveDocs ribbon, click Link documents. The Link documents window opens.
- In the Link Documents window, choose the source and target language, and adjust alignment settings. In addition, you may want to remove one or both of the original documents after they are linked.
When memoQ links two monolingual documents, it actually copies the documents into a new document pair. memoQ can keep the original monolingual documents intact. However, you can choose to delete them.
To learn more: See Help about the Link documents window.
You have greater control over pre-translation and statistics if you take your matches from a translation memory rather than a LiveDocs corpus. It often makes sense to turn the bilingual content in a LiveDocs corpus into a translation memory. Here is how you can do it:
- Add at least one translation memory to the project. (Use the Translation memories pane for that.)
If the project has two or more target languages: Select one of the target languages. You can export bilingual content to a translation memory for one target language at a time.
- Add the LiveDocs corpus to the project, and select it in the upper half of the LiveDocs pane.
- At the bottom of the LiveDocs pane, select the alignment pairs and bilingual documents that you want to export to the translation memory. You can select all documents: memoQ will automatically skip monolingual and binary documents.
- On the LiveDocs ribbon, click Export to TM. The Export to TM window opens.
- Select the translation memories to export the contents to, and click OK.
At the top of the second list - the list of documents in a LiveDocs corpus -, there are a few drop-down boxes. You can narrow down the list by choosing one or more content types, one or more target languages, and one or more keywords.
For example, you can choose to see bilingual documents into German, which have the keyword 'Legal'.
- To choose the content type, expand the drop-down box above the Name column:
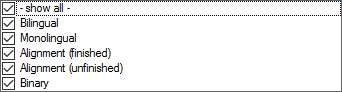
Normally, memoQ shows all types of documents from the LiveDocs corpus. To hide documents of one type or another, clear its check box. For example, if you clear the Monolingual check box, memoQ won't show the monolingual documents in the corpus.
To switch all types back on, check the - show all - check box.
After you make your choice, click the top field of the drop-down box again.
- To choose the target languages, click the drop-down box above the Target language column. It will list all the target languages from the LiveDocs corpus.
You can choose one target language, or limit the list to the project's target languages. To do that, choose Project target.
After you make your choice, click the top field of the drop-down box again.
- To choose from keywords, click the drop-down box above the Keywords column. memoQ will list all the keywords from the LiveDocs corpus, with check boxes.
Normally, memoQ shows all documents - all keywords are on.
To choose one or just a few keywords, clear the - show all - check box, and then check the check boxes of keywords you need. memoQ will list those documents that have one of the keywords you select.
After you make your choice, click the top field of the drop-down box again.
You can export an entire LiveDocs corpus into XLIFF files. To do that:
- In the upper half of the LiveDocs pane, select the LiveDocs corpus you need to export.
- On the LiveDocs ribbon, click Export. A Save As window opens.
- Find a folder and a name for the file, and click Save.
Each document in the LiveDocs corpus will be saved in a separate MQXLZ (memoQ XLIFF) file, and the files will be zipped up. As a result, memoQ will save one .zip file only.
To import them back in a different LiveDocs corpus:
- Extract the .zip file in a folder on your computer.
- At the top of the LiveDocs pane, select the LiveDocs corpus where you need to import the documents.
- On the LiveDocs ribbon, below the second list, click Import. An Open window appears.
- Select one or more MQXLZ files. Click Open.
To export one or just a few files into XLIFF files:
- At the bottom of the LiveDocs pane - in the second list -, select one or more documents.
- On the LiveDocs ribbon, click Export. The Corpus document export options window opens.
- Under Export path, click Browse. Find a folder for the exported file.
- Check the Include all files in a single archive check box. memoQ will save a single zip file - as if you were exporting the entire corpus.
- Click OK.
For the time being, this is how you can make backup copies of your LiveDocs corpora.
Before you can edit documents in a LiveDocs corpus, you must add the corpus to your project.
Then, in the second list, right-click a document pair or a bilingual document or a monolingual document. From the menu, choose View/Edit.
memoQ opens an editor tab for the document or the document pair. The editor tab will be different for each type of document. However, they are all similar to the translation editor.
- For a document pair, the alignment editor opens.
To learn more: See Help about the alignment editor.
- For a bilingual document, the bilingual document editor opens.
To learn more: See Help about the Bilingual document (ActiveTM) editor.
- For a monolingual document, the monolingual document editor opens.
To learn more: See Help about the Monolingual document (Library) editor.
If you can't make changes to the documents: The LiveDocs corpus or the document may be read-only. To make a document read-only: In the second list, select the document. Under the list, click Toggle read-only. To unlock the document, do the same again.
To view the properties of a LiveDocs corpus:
- In the upper half of the LiveDocs pane, select the corpus.
- On the LiveDocs ribbon, click Properties. The Corpus properties window opens.
In the Corpus properties window, you can change the basic details of a corpus, and choose when it will index new or changed documents.
To learn more: See Help about the Corpus properties window.
To choose how a LiveDocs corpus is actually used in a project: You need to choose a LQA model. You can choose this for the entire project, in the Settings pane.
A LQA model is mostly about the penalties that memoQ takes from matches when the alignment of a document pair is not entirely confirmed. You may want to use different penalties for each corpus. In this case, it makes sense to choose a LQA model for the corpus, and not for the project.
To choose a LQA model for a LiveDocs corpus:
- In the upper half of the LiveDocs pane, select the corpus.
- On the LiveDocs ribbon, click Settings. The Select corpus settings window opens:
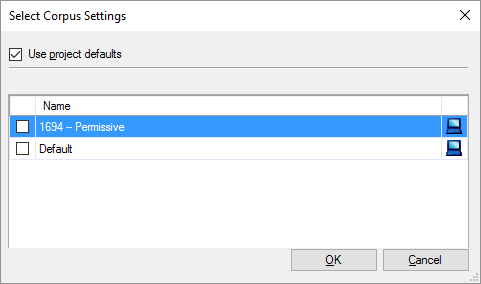
- Normally, you would use the settings from the project. However, the Select corpus settings window lists all LQA models from the server.
- Check the check box of the LQA model you need to use.
- Click OK.
To remove one or more documents from a LiveDocs corpus:
- At the bottom of the LiveDocs pane - in the second list -, select one or more documents.
- On the LiveDocs ribbon, click Remove. memoQ will ask if you really want to remove these documents.
- If you did not do this by accident, click Yes.
The screen may become too small for the two lists - if there are many LiveDocs corpora, and there are many documents in them. You can hide each list and their controls. Use the five buttons at the top of the LiveDocs pane.
![]() : Shows or hides the filter for the list of LiveDocs corpora. Normally, the filter controls are hidden.
: Shows or hides the filter for the list of LiveDocs corpora. Normally, the filter controls are hidden.
![]() : Shows or hides the commands for the list of LiveDocs corpora. Normally, the commands are visible.
: Shows or hides the commands for the list of LiveDocs corpora. Normally, the commands are visible.
![]() : Shows the list of corpora only. The documents in the selected corpus are not displayed.
: Shows the list of corpora only. The documents in the selected corpus are not displayed.
![]() : Shows both the list of corpora, and the documents in the highlighted corpus. This is the default setting.
: Shows both the list of corpora, and the documents in the highlighted corpus. This is the default setting.
![]() : Shows the documents in the selected corpus only. The list of corpora is not displayed.
: Shows the documents in the selected corpus only. The list of corpora is not displayed.
When you finish
To return to your work: Click a document tab at the top of the memoQ window (in the same row as the Project home tab). In most cases, you will return to the translation editor.
To close the project: Click the Close icon in the Project home tab: ![]() Or, on the Project ribbon, click Close Project.
Or, on the Project ribbon, click Close Project.
You can close memoQ, too, if you do not need to work on another project.
You can start creating another project: If you do that, memoQ will automatically close your current project.
- Project home – Overview (translator pro edition)
- Project home - Overview (project manager edition)
- Project home – Translations (translator pro edition)
- Project home – Translations (project manager edition)
- Project home - People (project manager edition)
- Project home - Finances
- Project home – Translation memories
- Project home – Term bases
- Project home - Muses
- Project home – Settings
Project managers, you can switch windows: You can open several online projects for management. Each online project opens in a separate window. To switch between them and the Dashboard or Project home (if you have a local project open): press and hold down Alt, and press Tab a few times until you get to the window you want. Or: On the Windows taskbar, click the memoQ icon, and then click the window you want to switch to.
=======